
Some new products are nice additions to your craft room. Others completely change the way you look at a blank piece of cardstock. The new Stampin' Up! Hot Foil System definitely falls into the second category.
Today's easy hot foil background techniques will show you just how simple it is to create those gorgeous metallic details you've admired on luxury cards and stationery. With just a little foil, a touch of heat, and a few beautiful dies, you'll be creating elegant handmade cards in no time.
Whether you love bold all-over floral designs, delicate foiled accents, or beautifully layered greetings, this new system opens up a whole new world of creative possibilities. I'll be sharing several easy hot foil background techniques using the gorgeous Garden Silhouette Hot Foil Die, the versatile Botanical Glow Bundle, and the elegant Classic Greetings Hot Foil Dies so you can see just how much shine and sophistication foil can add to your handmade cards.
The best part? Every Hot Foil product you purchase through my Stampin' Up! online store earns Stampin' Rewards, which means today's supplies can help you save toward tomorrow's crafting wishlist. Those rewards can be used on more Hot Foil Rolls, stamp sets, dies, cardstock, embellishments...whatever inspires your next creative adventure!
✨ New to the Stampin’ Up! Hot Foil System?
Today’s project focuses on hot foil background techniques, but if you’re just getting started with hot foiling, I’ve created a complete beginner’s guide to help you learn the basics.
Inside you’ll discover:
✔ Answers to frequently asked questions
✔ How the Hot Foil System works
✔ Beginner tips and tricks
✔ Troubleshooting advice
✔ Printable quick-reference guides
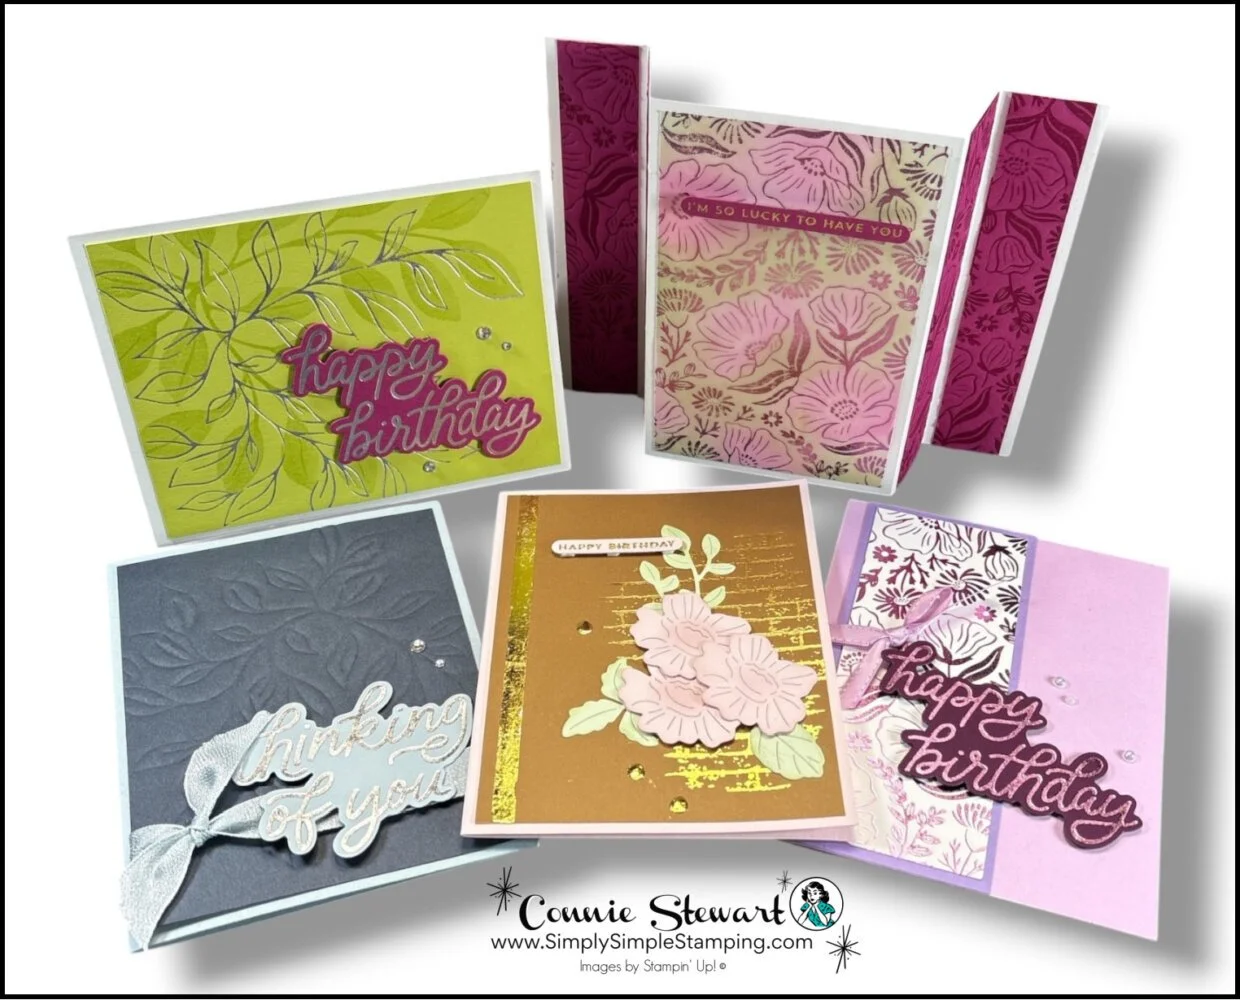
Watch Easy Hot Foil Background Techniques Every Cardmaker Should Try
If you've been looking for a simple way to add elegance, shine, and professional-looking detail to your handmade cards, you're going to love today's tutorial! I'm sharing several easy hot foil background techniques using the brand-new Stampin' Up! Hot Foil System that are surprisingly beginner friendly and so much fun to create.
We'll explore how different Hot Foil Dies can create everything from bold all-over floral backgrounds to delicate botanical accents and beautifully foiled greetings. Whether you're just getting started with hot foiling or looking for fresh inspiration, these techniques will have you reaching for your Hot Foil System again and again.
So grab your favorite beverage, settle into your crafting chair, and let's add a little shimmer to your next card!
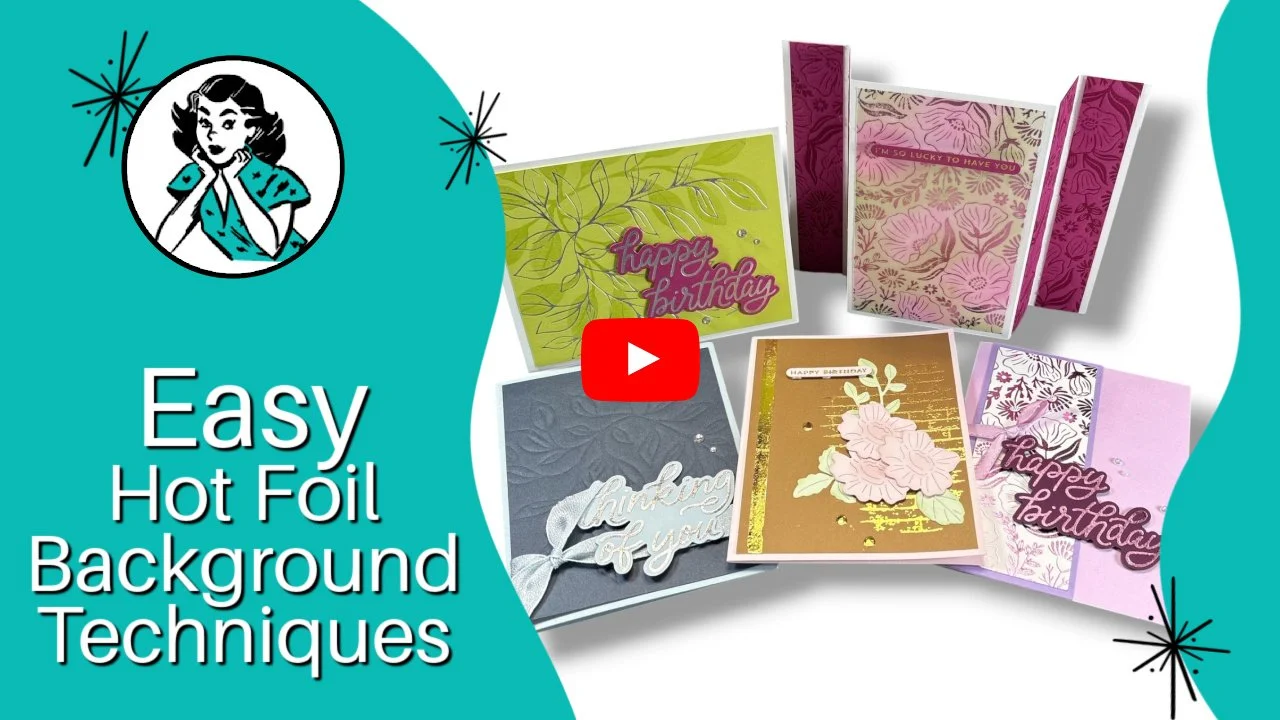
⭐️ Which of these hot foil background techniques are you most excited to try first? I'd love to hear which idea inspired you the most! Leave me a comment below.
Ready to Create these Hot Foil Cards?
I can't believe how much you can do with this machine! The possibilities just go on and on! I am still learning (and loving) the Hot Foil System but WAHOOO I am so impressed!!!!
Basic Hot Foiling
Place the machine on the Platform Station. Plug in the machine and wait for the red light to stop flashing.
Place the die, flat side down, lay a piece of foil on top of the die, foil side down, lay cardstock on top.
Lay the green plate on top, followed by the clear plate.
Hit the Timer and when the machine beeps, disconnect the power.
Run the machine/plates SLOWLY through the Stampin’ Cut & Emboss Machine.
Place machine back on the Platform Station, remove the 2 plates. Use the magnetic pick up tool to pick up the die, cardstock, and foil and place on the silicone cooling mat.
Allow the foil to cool for a few seconds then remove the foil from the cardstock.
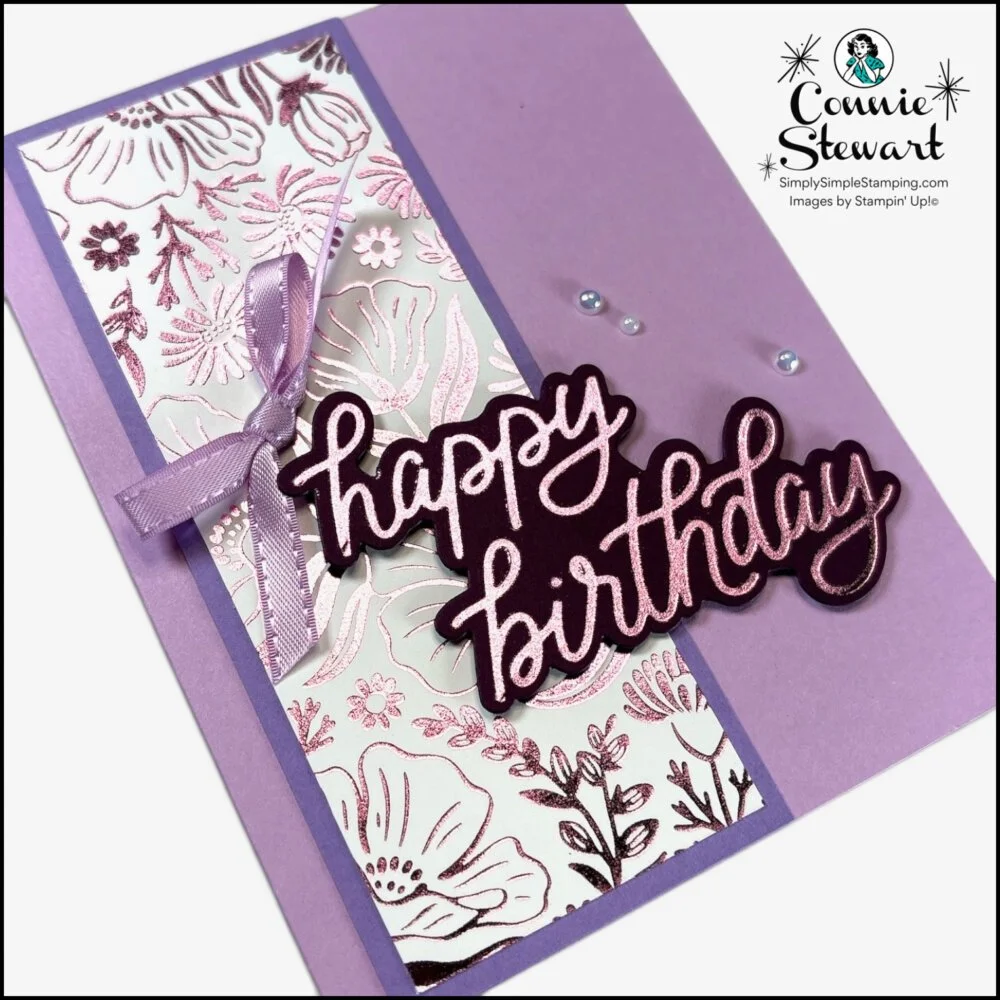
BASIC FOILING
Garden Silhouette and Classic Greetings
Fresh Freesia: 8 ½” x 5 ½”, score at 4 ¼” (card base)
Highland Heather: 2 ¼” x 5 ½” (layer)
Basic White: 2" x 5 ¼” (hot foil background)
Blackberry Bliss: 4 ¼” x 2 ¾” (hot foil greeting)
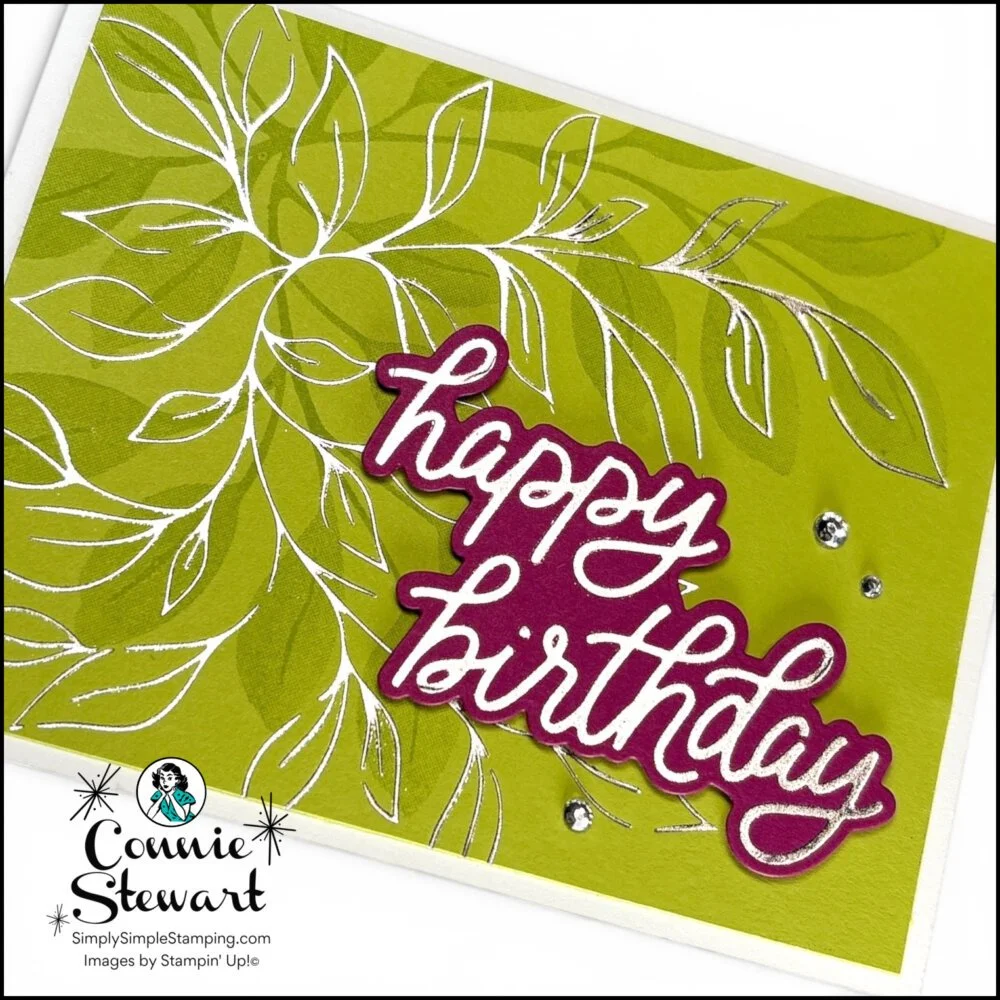
STAMPING AND FOILING
Botanical Glow and Classic Greetings
Basic White Thick: 8 ½” x 5 ½”, score at 4 ¼” (card base)
Lemon Lime Twist: 4” x 5 ¼” (hot foil greeting)
Berry Burst: 4 ¼” x 2 ¾” (hot foil greeting)
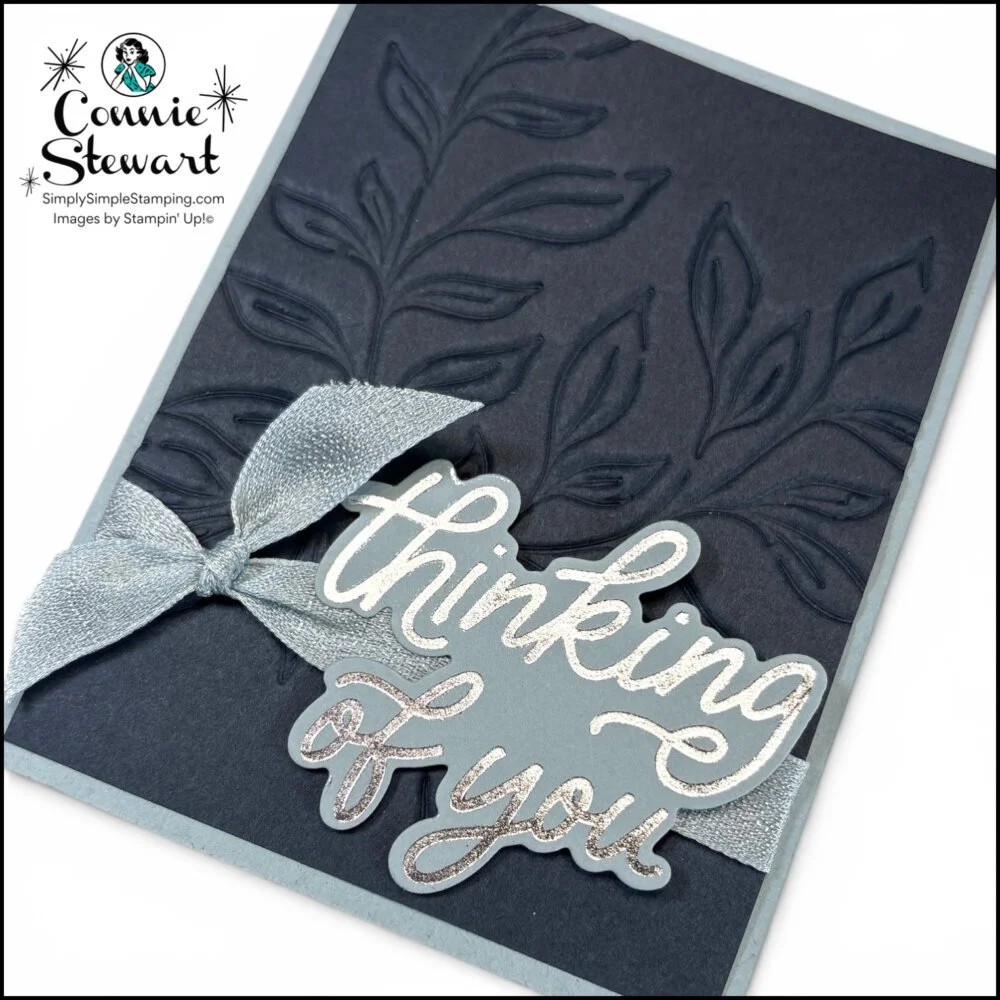
DEEP DRY EMBOSSING WITH FOIL DIES
Botanical Glow and Classic Greetings
Secret Sea: 4” x 5 ¼” (dry embossed background)
Cloud Cover:
8 ½” x 5 ½”, score at 4 ¼” (card base)
3 ½” x 3 ½” (hot foil greeting)
Deep Dry Embossing:
Base Plate 1
Cutting Plate 3
Die face up
Cardstock
Impressions Mat
Cutting Plate 3
Run through Stampin’ Cut & Emboss Machine
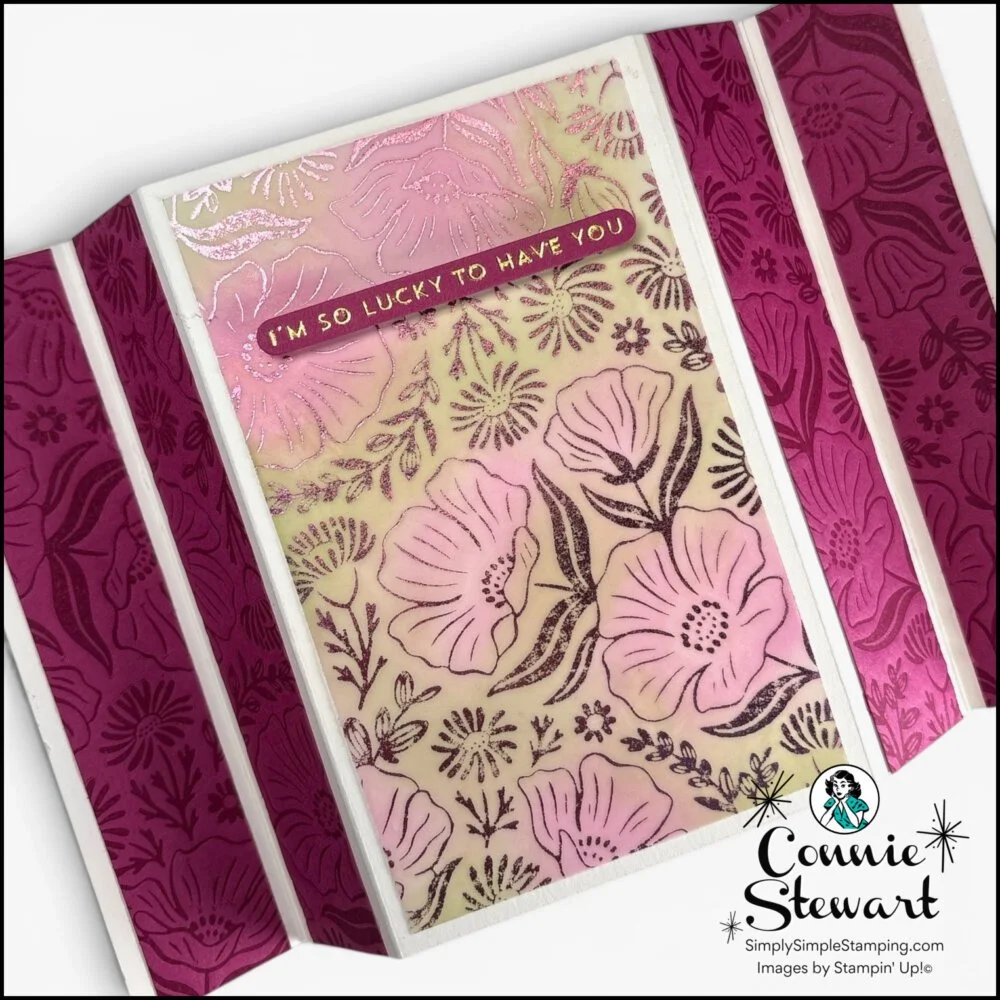
VELLUM FOILING AND INKED DRY EMBOSSING
Garden Silhouette and Sweetly Sentimental
Basic White Thick: 8 ½” x 5 ½”, score at 1 ¼” and 2 ½” on each end (card base)
Berry Burst:
(4) 1” x 5 ½” (inked embossed sides)
4” x 5” (hot foil greetings)
Vellum: 3 ½” x 5 ½” (hot foil background)
Inked Light Dry Embossing:
Base Plate 1
Thin Die Adapter Plate 2
Cutting Plate 3
DSP Backing Shim (6" x 6")
Add ink to the die and place on the shim, die face up
Cardstock
Copy Paper (to keep the ink from transferring on the Impressions Mat)
Impressions Mat
Run through Stampin’ Cut & Emboss Machine
Rinse & dry the die
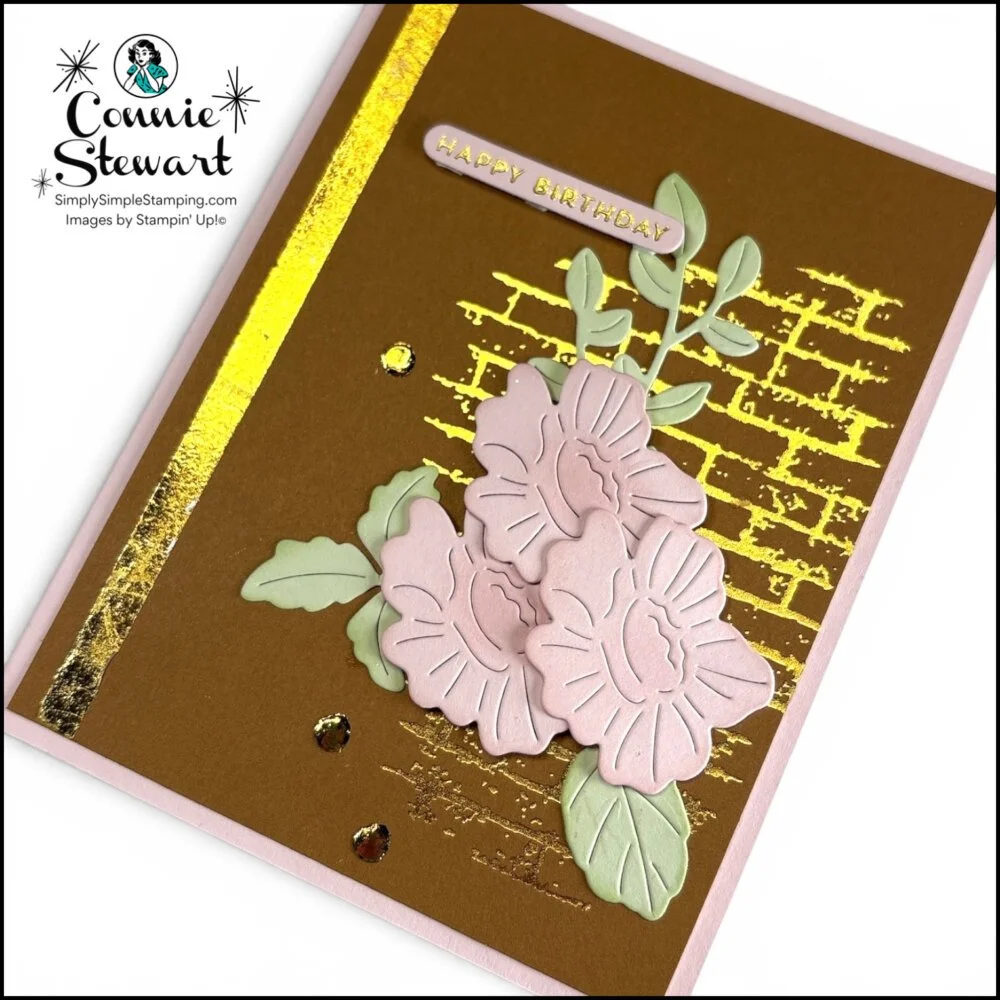
CREATE FUN EMBELLISHMENTS WITH LEFTOVER FOIL
Echoes of Detail and Sweetly Sentimental
Pecan Pie Two-Tone: 4” x 5 ¼” (hot foil background)
Barely Blush:
8 ½” x 5 ½”, score at 4 ¼” (card base)
5 ½” x 2” (die cut flowers)
Soft Sea Foam : 2 ½” x 3” (die cut leaves)
Ways to Use Your Leftover Foil:
Stripes:
Place Tear & Tape down the side of cardstock
Burnish the Tape and then remove the backing
Place the foil with the pretty side UP
Press the foil down firmly onto the Tear & Tape
Gently pull the foil off the tape
Dots:
Press Mini Glue Dots on the cardstock
Place the foil on the glue dots with the pretty side UP
Press firmly
Gently pull the foil off the glue dots
Adhesive Sheets (not shown):
Place adhesive sheet on cardstock
Die cut or punch image
Place the foil on the adhesive sheet with the pretty side UP
Press firmly
Gently pull the foil off
* Diagrams and written tutorials are available to YouTube Members - Learn more HERE
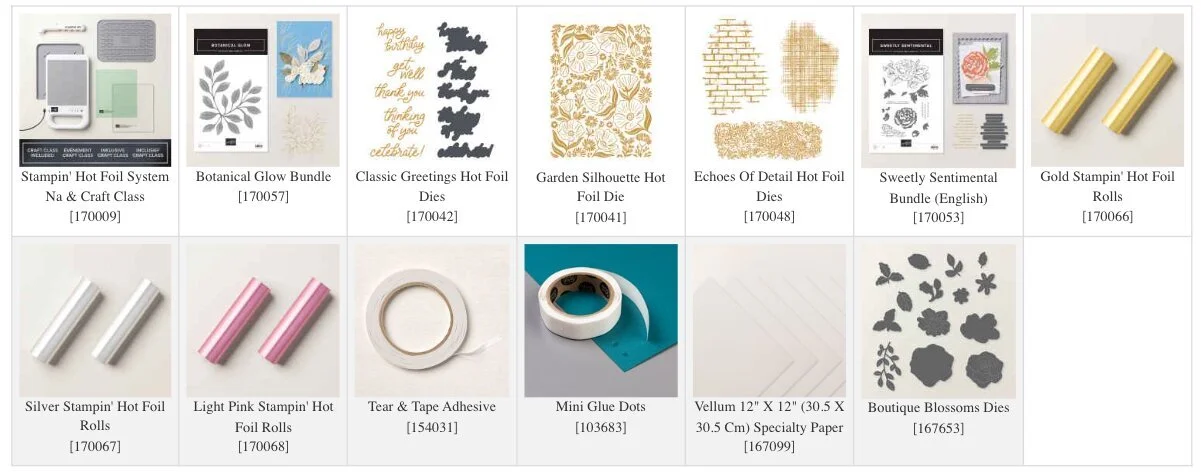
Stampin' Up! Product List for Today's Cards
Click on the picture to add to your cart
Thank you for choosing me to be your Stampin’ Up! Demonstrator!

WOW! Earn Stampin’ Rewards on orders over $20 (before tax/ship.
Spend them on your next Stampin' Up! order or save them up for a bigger purchase!
Pinterest-ing
Don't let this inspiration disappear into the internet! 📌 Be sure to Pin your favorite hot foil background techniques to one of your card making, scrapbooking or stamping Pinterest boards so you'll have these ideas handy whenever you're ready to create. And while you're there follow me on Pinterest for even more card making inspiration, creative techniques, and fresh project ideas added throughout the year.


I hope these easy hot foil background techniques have inspired you to experiment with the beautiful new Stampin' Up! Hot Foil System and discover just how simple it is to create elegant handmade cards with dazzling metallic accents. Remember, every order placed through my online store earns Stampin' Rewards, making it even more fun to build your crafting collection one project at a time.
Be sure to stop back next Tuesdayfor another brand-new card making idea, and don't forget to leave me a comment and let me know if you’ll be spending time in your craft room this weekend. Until next time...happy stamping!

So what’s this new YouTube Membership thing all about?
It’s a fun, optional way to get even more crafting content, perks, and behind-the-scenes fun!





